Linux
htop
- PID: process ID number.
- USER: process owner.
- PRI: process priority by the kernel.
- NI: process priority reset by the user or root.
- VIR: virtual memory the process is consuming.
- RES: physical memory the process is consuming.
- SHR: shared memory that the process is consuming.
- S: current process state.
- CPU%: percentage of CPU that the process is consuming.
- MEM%: percentage of memory that the process is consuming.
- TIME+: time measured in clock ticks since process execution started.
- Command: name of the command that started the process
Useful Shortcut Keys
u: displays all processes owned by a particular user.
p: sort processes on high CPU consumption.
m: sort processes on high memory consumption.
t: sort process on time.
Space: tag a process
c: tag a process and child processes
Shift + u: remove all tags.
Shift + f: highlight and follow a process.
Shift + h: show/hide user and kernel processes.
a: set what CPU cores a process can access.
i: set IO priority.
h: help menu.
History Command
fc -l <start> <end> | grep "docker"
# fc -l 4630 4810 | grep "docker"
Network
Check used port
sudo netstat -pna | grep 8888
# or
netstat -anv | grep LISTEN
UDP CLI Test Tool
Establish Connection
Server Side:
nc -u -l 9999
9999 is server-side port
-u is udp protocol
Client Side:
nc -u 192.168.0.100 9999
192.168.0.100 is server IP
9999 is server port
Check Connection
netstat | grep 9999
Send Package
In client side, send:
"Hi server!"
In Server side, send:
"hi, client"
Check Network Latency
Linux 网络延迟
谈到网络延迟(Network Latency),人们通常认为它是指网络数据传输所需的时间。但是,这里的"时间"是指双向流量,即数据从源发送到目的地,然后从目的地地址返回响应的往返时间:RTT(Round-Trip Time)。除了网络延迟之外,另一个常用的指标是应用延迟(Application Latency),它是指应用接收请求并返回响应所需的时间。通常,应用延迟也称为往返延迟,它是网络数据传输时间加上数据处理时间的总和。 通常人们使用 ping 命令来测试网络延迟,ping 是基于 ICMP 协议的,它通过计算 ICMP 发出的响应报文和 ICMP 发出的请求报文之间的时间差来获得往返延迟时间。这个过程不需要特殊的认证,从而经常被很多网络攻击所利用,如,端口扫描工具 nmap、分组工具 hping3 等。 因此,为了避免这些问题,很多网络服务都会禁用 ICMP,这使得我们无法使用 ping 来测试网络服务的可用性和往返延迟。在这种情况下,您可以使用 traceroute 或 hping3 的 TCP 和 UDP 模式来获取网络延迟。tool 1:
# -c: 3 requests
# -S: Set TCP SYN
# -p: Set port to 80
$ hping3 -c 3 -S -p 80 google.com
HPING google.com (eth0 142.250.64.110): S set, 40 headers + 0 data bytes
len=46 ip=142.250.64.110 ttl=51 id=47908 sport=80 flags=SA seq=0 win=8192 rtt=9.3 ms
len=46 ip=142.250.64.110 ttl=51 id=6788  sport=80 flags=SA seq=1 win=8192 rtt=10.9 ms
len=46 ip=142.250.64.110 ttl=51 id=37699 sport=80 flags=SA seq=2 win=8192 rtt=11.9 ms
--- baidu.com hping statistic ---
3 packets transmitted, 3 packets received, 0% packet loss
round-trip min/avg/max = 9.3/10.9/11.9 ms
tool 2:
$ traceroute --tcp -p 80 -n google.com
traceroute to google.com (142.250.190.110), 30 hops max, 60 byte packets
 1  * * *
 2  240.1.236.34  0.198 ms * *
 3  * * 243.254.11.5  0.189 ms
 4  * 240.1.236.17  0.216 ms 240.1.236.24  0.175 ms
 5  241.0.12.76  0.181 ms 108.166.244.15  0.234 ms 241.0.12.76  0.219 ms
 ...
24  142.250.190.110  17.465 ms 108.170.244.1  18.532 ms 142.251.60.207  18.595 ms
traceroute 会在路由的每一跳(hop)发送三个数据包,并在收到响应后输出往返延迟。如果没有响应或响应超时(默认 5s),将输出一个星号 *
deb package
$ dpkg -i package.deb #安装/更新一个 deb 包
$ dpkg -r package_name #从系统删除一个 deb 包
$ dpkg -l #显示系统中所有已经安装的 deb 包
$ dpkg -l | grep httpd #显示所有名称中包含 "httpd" 字样的deb包
$ dpkg -s package_name #获得已经安装在系统中一个特殊包的信息
$ dpkg -L package_name #显示系统中已经安装的一个deb包所提供的文件列表
$ dpkg --contents package.deb #显示尚未安装的一个包所提供的文件列表
$ dpkg -S /bin/ping #确认所给的文件由哪个deb包提供
#APT 软件工具 (Debian, Ubuntu 以及类似系统)
$ apt-get install package_name #安装/更新一个 deb 包
$ apt-cdrom install package_name #从光盘安装/更新一个 deb 包
$ apt-get update #升级列表中的软件包
$ apt-get upgrade #升级所有已安装的软件
$ apt-get remove package_name #从系统删除一个deb包
$ apt-get check #确认依赖的软件仓库正确
$ apt-get clean #从下载的软件包中清理缓存
$ apt-cache search searched-package #返回包含所要搜索字符串的软件包名称
tree
-L 2: Depth 2
$ tree -L 2 -N /
Only show directories:
$ tree -L 2 -d -N /
no indentation + full path
$ tree -L 2 -d -fi -N /
strace
strace is a debug tool which helps you to debug your APP.
save tracing message to .txt:
$ strace -o debug.txt yourApp
check system calls:
$ strace -c yourApp
Extracting info by specific keyword, like open:
$ strace -e open yourApp
Tracing by timestamp:
$ strace -t yourApp
ltrace
lib trace tool
$ ltrace -t yourApp
Find Biggest Files and Directories in Linux
$ du -a /your_dir | sort -n -r | head -n 5
du command: Estimate file space usage. a : Displays all files and folders. sort command : Sort lines of text files. -n : Compare according to string numerical value. -r : Reverse the result of comparisons. head : Output the first part of files. -n : Print the first ‘n' lines. (In our case, We displayed first 5 lines).
Find all files modified between time A and time B
find . -type f -newermt 2007-06-07 ! -newermt 2007-06-08
Find files accessed between time A and time B
find . -type f -newerat 2008-09-29 ! -newerat 2008-09-30
Files which had their permission changed on the same day
find . -type f -newerct 2008-09-29 ! -newerct 2008-09-30
Find all Directory modified between time A and time B
find . -type f -newermt 2007-06-07 ! -newermt 2007-06-08
setting directory depth parameter
find . -maxdepth 2 -type d -newermt 2007-06-07 ! -newermt 2007-06-08
Human Readable Format
$ du -hs * | sort -rh | head -5
Display the largest folders/files including the sub-directories
$ du -Sh | sort -rh | head -5
du command: Estimate file space usage. -h : Print sizes in human readable format (e.g., 10MB). -S : Do not include size of subdirectories. -s : Display only a total for each argument. sort command : sort lines of text files. -r : Reverse the result of comparisons. -h : Compare human readable numbers (e.g., 2K, 1G). head : Output the first part of files.
Total files' number
find . -mindepth 1 -maxdepth 1 | wc -l
ls command
find 5 most-recently modified files
$ ls -1t | head -5
last 5 modified files
$ ls -1t | tail -5
softlink and hardlink
create soft link
$ ln -s {source-filename} {symbolic-filename}
verify
$ ls -l file1 link1
overwrite symlinks/Soft link
$ ln -f -s file link
unlink
$ unlink symlink_name
or
$ rm symlink_name
file numbers in a directory
ls | wc -l
find command
$ find /dir -name keyword
cat command
Print 5 lines:
$ head -n 5 my.txt
print with line number:
$ cat -n my.txt
Generate a yaml file
export AWS_CLUSTER_NAME=kubeflow-demo-msp
export AWS_REGION=us-west-2
export K8S_VERSION=1.19
export EC2_INSTANCE_TYPE=m5.large
cat << EOF > cluster.yaml
---
apiVersion: eksctl.io/v1alpha5
kind: ClusterConfig

metadata:
  name: ${AWS_CLUSTER_NAME}
  version: "${K8S_VERSION}"
  region: ${AWS_REGION}

managedNodeGroups:
- name: kubeflow-mng
  desiredCapacity: 3
  instanceType: ${EC2_INSTANCE_TYPE}
EOF
check
cat cluster.yaml
ffmpeg
cut audio from video file
ffmpeg -i input.webm -ss start_time -t duration -c:a pcm_s16le output.wav
ffmpeg -i input.webm -ss 00:00:30 -t 00:00:10 -c:a pcm_s16le output.wav
Resize Video:
$ ffmpeg -i input_video.mp4 -s 640x480 -c:a copy out.mp4
Extract frame in a video(every 10 frames):
$ ffmpeg -i out.mp4 -vf "select=not(mod(n\,10))" -vsync vfr -q:v 2 img_%05d.jpg
change file format:
$ ffmpeg -i out.mp4 -c copy sample.h264
cut video:
$ ffmpeg -ss 00:01:26 -t 00:01:52 -i dog.mp4 -acodec copy -vcodec copy -async 1 cut.mp4
An image to a video:
$ ffmpeg -loop 1 -i sample.jpg -c:v libx264 -t 5 -pix_fmt yuv420p -vf "pad=ceil(iw/2)*2:ceil(ih/2)*2" out.mp4
jpg images to a video
$ ffmpeg -r 1/5 -f concat -i list.txt -c:v libx264 -r 25 -pix_fmt yuv420p -t 15 out.mp4
Change video file pixel format
# Using the format filter (yuv420p)
ffmpeg -i in_file -filter:v "format=yuv420p" out_file

# Using the 'pix_fmt' option
ffmpeg -i in_file -pix_fmt yuv420p out_file
re-encoding
ffmpeg -i a.mp4 -c:v libx264 -crf 18 -preset slow -c:a copy output.mp4
Stack Videos
Horizontal Stack:
ffmpeg -i input0.mp4 -i input1.mp4 -filter_complex hstack=inputs=2 horizontal-stacked-output.mp4
Vertical Stack:
ffmpeg -i input0.mp4 -i input1.mp4 -filter_complex vstack=inputs=2 vertical-stack-output.mp4
2×2 Grid of Videos:
ffmpeg \
-i input0.mp4 -i input1.mp4 -i input2.mp4 -i input3.mp4 \
-filter_complex \
"[0:v][1:v]hstack=inputs=2[top]; \
[2:v][3:v]hstack=inputs=2[bottom]; \
[top][bottom]vstack=inputs=2[v]" \
-map "[v]" \
finalOutput.mp4
3×2 Grid of Videos:
ffmpeg \
-i input0.mp4 -i input1.mp4 \
-i input2.mp4 -i input3.mp4 \
-i input4.mp4 -i input5.mp4 \
-filter_complex \
"[0:v][1:v][2:v]hstack=inputs=3[top];\
[3:v][4:v][5:v]hstack=inputs=3[bottom];\
[top][bottom]vstack=inputs=2[v]" \
-map "[v]" \
finalOutput.mp4
concat videos
concat demuxer:
$ cat mylist.txt
file '/path/to/file1'
file '/path/to/file2'
file '/path/to/file3'

$ ffmpeg -f concat -safe 0 -i mylist.txt -c copy output.mp4
rotate video:
$ ffmpeg -i "in.mp4" -metadata:s:v "rotate=90" -c copy "out.mp4"
or
# rotate 90 degree
#0 = 90CounterCLockwise and Vertical Flip (default)
#1 = 90Clockwise
#2 = 90CounterClockwise
#3 = 90Clockwise and Vertical Flip
# -vf "transpose=2,transpose=2" for 180 degrees.

$ ffmpeg -i in.mov -vf "transpose=1" out.mov
Resize image:
$ ffmpeg -i input.jpg -vf scale=320:240 output_320x240.png
or
$ ffmpeg -i input.jpg -vf scale=320:-1 output_320x240.png
Add image to video:
# tl=(5,5)
$ ffmpeg -i input.mp4 -i logo.png -filter_complex "overlay=5:5" -codec:a copy output.mp4
Convert 10-bit H.265 to 10-bit H.264
$ ffmpeg -i input -c:v libx264 -crf 18 -c:a copy output.mkv
-
-crf 18appear visually lossless -
-crf 0lossless mode
Convert 10-bit H.265 to 8-bit H.265
$ ffmpeg -i input -c:v libx265 -vf format=yuv420p -c:a copy output.mkv
Convert 10-bit H.265 to 8-bit H.264
$ ffmpeg -i input -c:v libx264 -crf 18 -vf format=yuv420p -c:a copy output.mkv
video to GIF
Generate color_palette.png
$ ffmpeg -i sample.mp4 -filter_complex "[0:v] palettegen" color_palette.png
Generate GIF file:
$ ffmpeg -i sample.mp4 -i color_pallet.png -filter_complex "[0:v][1:v] paletteuse" -r 10 -s 640x360 my_gif_file.gif
Shell Script
Array
arr=(1 2 3)
array size: ${#arr[@]}
arr[0] element: ${arr[0]}
array's all items: ${arr[*]} or ${arr[@]}
arr[0] element size: ${#arr[0]}
User Input
Input command: read -p 'name: ' uservar
Silient input command: read -sp 'name: ' uservar
Get IP last Number
var=123.444.888.235
new_var="${var%.*}.0"
if else
if [condition];then
    # do something
elif [condition];then
    # do something
else
    # do something
fi
Replace String's Character
solution 1: Use tr
E.g. Replace 192.168.0.111 to 192_168_0_111
$ server_ip=192.168.0.111
$ echo "$server_ip" | tr . _
Result:
192_168_0_111
solution 2: Use bash expansion
$ server_ip=192.168.0.111
$ result=${server_ip//[.]/_}
Result:
192_168_0_111
More usage:
Only replace first match char:
${string/substring/replacement}
Replace all match chars:
${string//substring/replacement}
Change IP In Terminal
Sample:
$ sudo ifconfig eth0 192.168.0.1 netmask 255.255.255.0
Find Top 10 Largest File/Directories
In terminal:
$ sudo du -a /var | sort -n -r | head -n 10
Check Disk Usage
df -h /var/lib/docker
Disk Mount
driver check
sudo fdisk -l
Format a disk
# sudo mkfs -t ext4 /dev/sda
Disk mount
# sudo mkdir /dev/hdd
# sudo mount /dev/sda /dev/hdd
# sudo chmod 777 /dev/hdd
Auto mount after booting
sudo vim /etc/fstab
# 파일 밑에 아래 줄 추가
#/dev/sda /dev/hdd ext4 defaults 0 0
check mount
df -h
tr command
tr is a command line utility for translating or deleting characters.
Replace character: tr -c
There are string1=aaabbbccc, string2=ab:
$ echo -n "aaabbbccc" | tr -c ab k
result:
aaabbbkkk
Delete repeated characters: tr -s
There are string1=aaabbbccc:
$ echo -n "aaabbbccc" | tr -s '[a-z]'
result:
abc
Delete Characters: tr -d
There are string1=aaabbbccc:
$ echo -n "aaabbbccc" | tr -d bbb
result:
aaaccc
Replace lowercase to uppercase
$ echo aaabbbccc | tr '[a-z]' '[A-Z]'
result:
AAABBBCCC
Chown Command
Change File or Folder's Owner
Check Folder or File's Owner
$ ls -lt
sample result:
drwxr-xr-x 2 root root 4096 Jan 15 23:34 foo
Change Owner To Specific User
$ sudo chown user1:user1 <file>
sample:
$ sudo chown wendy:wendy foo
Or use User ID:
$ chown 1000:1000 foo.txt
Check User ID:
$ id
sample result:
uid=1000(wendy) gid=1000(wendy) groups=1000(wendy),4(adm),20(dialout),24(cdrom),27(sudo),30(dip),46(plugdev),116(lpadmin),126(sambashare)
Change To Root
$ sudo chown root foo
Change Group To Root
$ sudo chown :root foo
Chaner Folder's Owner
$ chown -R wendy:wendy foo-folder
https://miseon119.github.io/whylearn.github.io/test/images/git-workflow-diagram3.png
SSH Config Setting
SSH Config File Sample
Common Remote Control Command via SSH:
$ sudo ssh Jane@192.168.0.1
If you want to SSH your remote PC by short command such as ‘ssh JanePC', or you control many remote PCs. Maybe you need this ‘config' file instead. It usually locates in ~/.ssh/config. If not, create one.
Sample config file:
Host JanePC
    HostName 192.168.0.1
    User Jane

Host BillPC
    HostName 192.168.0.2
    User Bill
After saving the config file, and then open terminal type ssh JanePC. You can access Jane@192.168.0.1.
SSH X11 Forwarding
Server PC Requirement:
Step 1:
$ sudo apt-get install xauth
Step 2: Modify /etc/ssh/sshd_config file
X11Forwarding yes
Client PC Requirement:
Step 1: vim ~/.ssh/config, add ForwardX11 yes
Sample config
 Host JanePC
    HostName 192.168.0.1
    User Jane

Host BillPC
    HostName 192.168.0.2
    User Bill

 Host *
  ForwardX11 yes
Step 2: Test
ssh -X Jane@192.168.0.1
$ gedit
SSH Remote Control Without Password
Step 1: Generate public key
$ ssh-keygen
This will create id_rsa.pub key under ~/.ssh/ directory.
Step 2: Copy the key around remote PC
$ ssh-copy-id -i .ssh/id_rsa.pub Jane@192.168.0.1
Step 3: Test
$ ssh Jane@192.168.0.1
Enable Or Disable X11 Forwarding in SSH server
Modify sshd configuration file:
$ sudo vim /etc/ssh/sshd_config
Search X11Forwarding:
X11Forwarding no
Reload or restart SSH server service:
$ sudo systemctl restart sshd
Swap Memory
In Linux OS, whenever RAM has an insufficient amount of memory to hold a process, it borrows some amount of memory from the secondary storage to store its inactive content. Here, the borrowed space from the hard disk is called Swap Memory. Linux swap is a very useful way to extend the RAM. Because it provides the necessary additional memory when RAM space has been exhausted and a process has to be continued.
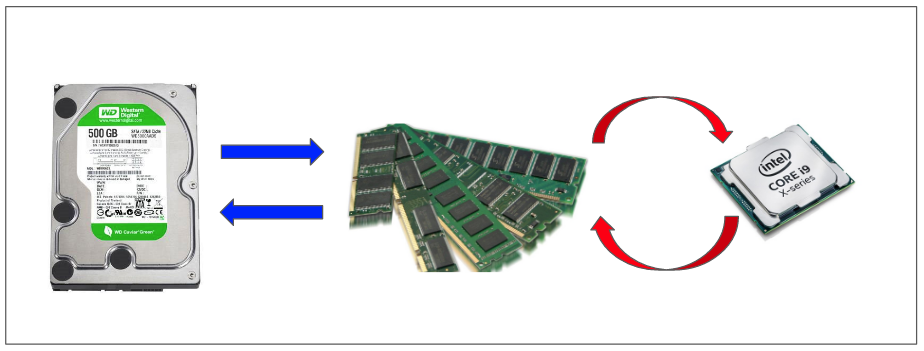
Pros:
- Swap saves from crashes
- It can easily hold those inactive blocks of RAM that are hardly used once or twice and then they are never used. The freed up RAM can then be used to hold more programs that have a higher priority
Cons:
- Swap is slower than RAM. Adding a swap space won't make your computer faster, it will only help to overcome some limitations posed by the RAM size.
The safest: RAM = SWAP
| RAM | SWAP |
|---|---|
| < 1Gb | 2Gb |
| 2-4Gb | 2-4Gb |
| 8Gb | 4Gb |
Check Swap Command
$ swapon
For reference, see: https://linuxhint.com/swap_memory_linux/
Cut Command
Cut text's words by specific colume
cut -c 5- < file1.txt > file2.txt
- [5-] cut start point which is 5th character.
file1.txt
aaaaabbbbbccccc
after hitting command:
file2.txt
abbbbbccccc
zip command
zip a directory but exclude some directories:
$ zip -r zip_file_name foo -x "foo/dir1/*" "foo/dir2/*"
uname
Linux Kernel Name
$ uname -s
Linux Kernel release
$ uname -r
Get Machine Architecture
$ uname --m
Processor Type
$ uname -p
Port-Forwarding
Set port-forwarding 3030 to 3030
sudo iptables -t nat -A PREROUTING -i eth0 -p tcp --dport 3030 -j REDIRECT --to-port 3030
Check port-forwarding
sudo iptables -t nat -L --line-numbers
Delete port-forwarding
sudo iptables -t nat -D PREROUTING 3
"3" is displayed in second command.
Terminal Setting
Install Terminator
$ sudo apt-get install terminator
Set Default Terminal
$ sudo update-alternatives --config x-terminal-emulator
Troubleshooting
apt-get update error
Detailed error message
W: An error occurred during the signature verification. The repository is not updated and the previous index files will be used. GPG error: https://apt.kitware.com/ubuntu focal InRelease: The following signatures couldn't be verified because the public key is not available: NO_PUBKEY 6AF7F09730B3F0A4
W: Failed to fetch https://apt.kitware.com/ubuntu/dists/focal/InRelease  The following signatures couldn't be verified because the public key is not available: NO_PUBKEY 6AF7F09730B3F0A4
W: Some index files failed to download. They have been ignored, or old ones used instead.
solution
sudo apt-key adv --keyserver keyserver.ubuntu.com --recv-keys 6AF7F09730B3F0A4
remmina codec error Ubuntun 18.04
$ sudo apt-add-repository ppa:remmina-ppa-team/remmina-next
$ sudo apt update
$ sudo apt install remmina remmina-plugin-rdp remmina-plugin-secret
$ sudo killall remmina
restart remmina
Docker Container
Gtk-WARNING **: cannot open display: :x.0
Add -v /tmp/.X11-unix:/tmp/.X11-unix -e DISPLAY=unix$DISPLAY option
ImportError: libGL.so.1: cannot open shared object file: No such file or director
e.g. unbuntu 18.04 docker
apt-get update
apt-get -y install libgl1-mesa-glx
dpkg
Error: E: Sub-process /usr/bin/dpkg returned an error code (1) when install a package.
Solution:
$ sudo rm -r /var/lib/dpkg/info/*
$ sudo dpkg --configure -a
$ sudo apt update -y
Can not open settings
Solution:
$ sudo apt-get remove gnome-control-center
$ sudo apt autoremove
$ sudo apt-get install gnome-control-center
System Settings Can't Open in Ubuntu 18.04
$ sudo apt-get remove gnome-control-center
$ sudo apt autoremove
$ sudo apt-get install gnome-control-center
journalctl command
retrieving messages from the last boot:
journalctl -b -1
To list the boots of the system:
journalctl --list-boots
Time Ranges
journalctl --since "1 hour ago"
journalctl --since "2 days ago"
journalctl --since "2015-06-26 23:15:00" --until "2015-06-26 23:20:00"
By Unit
To see messages logged by any systemd unit, use the -u switch. The command below will show all messages logged by the Nginx web server. You can use the –since and –until switches here to pinpoint web server errors occurring within a time window.
journalctl -u nginx.service
journalctl -u nginx.service -u mysql.service
Follow or Tail
 journalctl -u mysql.service -f
 journalctl -n 50 --since "1 hour ago"
The -r parameter shows journal entries in reverse chronological order, so the latest messages are printed first.
journalctl -u sshd.service -r -n 1
Output Formats
journalctl -u apache2.service -r -o json-pretty
Check Service log
$ journalctl -u service-name.service
for the current boot:
$ journalctl -u service-name.service -b
/var/log/ File Too Large
Check Error Log:
$ tail -f /var/log/syslog
Clearing the /var/log/syslog file:
$ sudo cat /dev/null > /var/log/syslog
Reset PATH
$ source /etc/environment
$ echo PATH
apt-get update failed
In some cases, update error like this:
Err:11 http://ppa.launchpad.net/inameiname/stable/ubuntu bionic Release
404 Not Found [IP: 91.189.95.85 80]
It mentioned inameiname message in this error.
Solution
Step 1:
$ cd /etc/apt/sources.list.d/
Step 2: Check your .list files:
$ ls -l
In my case, it's similar like this:
user@user:/etc/apt/sources.list.d$ ls -l
total 36
-rw-r--r-- 1 root root  71 Dec 29 10:34 gazebo-stable.list
-rw-r--r-- 1 root root  71 Dec 29 10:34 gazebo-stable.list.save
-rw-r--r-- 1 root root 189 Dec 29 10:34 google-chrome.list
-rw-r--r-- 1 root root 189 Dec 29 10:34 google-chrome.list.save
-rw-r--r-- 1 root root 138 Dec 29 10:34 inameiname-ubuntu-stable-bionic.list
-rw-r--r-- 1 root root 338 Dec 29 10:34 nvidia-container-runtime.list
-rw-r--r-- 1 root root 336 Dec 29 10:34 nvidia-container-runtime.list.save
-rw-r--r-- 1 root root 193 Dec 29 10:34 vscode.list
-rw-r--r-- 1 root root 193 Dec 29 10:34 vscode.list.save
-rw-r--r-- 1 root root 138 Dec 29 10:34 inameiname-ubuntu-stable-bionic.list this file maybe caused error.
Step 3:
$ sudo rm inameiname-ubuntu-stable-bionic.list
Step 4:
$ sudo apt-get update
Serial port permission denied errors
This is because the device file of the serial port does not have permissions to allow to currently logged in user to "read" or "write" to the serial device.
Confirm device user:
$ ls -l /dev/ttyUSB*
verify if the user does belong to the dialout group
$ id -Gn Jane
add the user to the "dialout" supplementary group
$ sudo usermod -a -G dialout <username>
logout and login, try the "id" command:
$ id -Gn Jane
dpkg common commands
Install package
$ sudo dpkg -i your.deb
Search installed package
$ sudo dpkg -l pkg_name
or
$ sudo dpkg --list pkg_name
$ dpkg -l | grep part_of_pkgName
remove
$ sudo dpkg --remove pkg_name
and
$ sudo dpkg --purge pkg_name
sudo apt-get install mailutils
mkfifo /var/spool/postfix/public/pickup
service postfix restart
 echo "Message Body Here" | mail -s "Subject Here" user@example.com -A backup.zip
youtube-dl
Download FHD video
youtube-dl -f 137 https://www.youtube.com/watch\?v\=8SVrydUA6oU
GStreamer
Preinstallation
$ sudo apt-get install v4l-utils
Check v4l devices
$ v4l2-ctl --list-devices
Check supported format
$ v4l2-ctl -d /dev/video0 --list-formats-ext
Check connected devices
$ v4l2-ctl --list-formats-ext
Commands
Hello World
$ gst-launch-1.0 videotestsrc ! 'video/x-raw, width=(int)1280, height=(int)720, format=(string)I420, framerate=(fraction)30/1' ! nveglglessink -e
vl4 device
Simple display
$ gst-launch-1.0 v4l2src ! xvimagesink
or
$ gst-launch-1.0 -ev v4l2src device=/dev/video1 ! xvimagesink
Save As .mp4
Using h264 codec:
$ gst-launch-1.0 videotestsrc ! 'video/x-raw, width=(int)1280, height=(int)720, format=(string)I420, framerate=(fraction)30/1' ! omxh264enc ! 'video/x-h264, stream-format=(string)byte-stream' ! h264parse ! qtmux ! filesink location=test.mp4 -e
Read video file
Read .mp4 and decodeing:
$ gst-launch-1.0 filesrc location=test.mp4 ! qtdemux name=demux ! h264parse ! omxh264dec ! nveglglessink -e
Read webcam and encoding stream
$ gst-launch-1.0 v4l2src device=/dev/video1 ! decodebin ! videoconvert ! omxh264enc ! h264parse ! omxh264dec ! nveglglessink -e
RTP Streaming
Send to host port 5000:
$ gst-launch-1.0 v4l2src device=/dev/video1 ! decodebin ! videoconvert ! omxh264enc ! video/x-h264, stream-format=byte-stream ! rtph264pay ! udpsink host=127.0.0.1 port=5000
Receive Streaming:
$ gst-launch-1.0 udpsrc port=5000 ! application/x-rtp, encoding-name=H264, payload=96 ! rtph264depay ! h264parse ! omxh264dec ! nveglglessink -e
Jpg image processing
gst-launch-1.0 multifilesrc location=img_%06d.jpg caps=image/jpeg,framerate=30/1 ! jpegdec ! videoconvert ! jpegenc ! multifilesink location=jpgs/img_post_%06d.jpg